6.1 User Interfaces
The OLIVE Platform provides several user interfaces to manage connectivity.
The URLs of your deployment
Every OLIVE interface lives on a subdomain of one base address, written throughout this handbook as
<tenant>.<cluster>.<domain>:
<tenant>— the tenant name. A development deployment has exactly one, oftensingle<cluster>— the cluster the deployment runs on, for exampledeveloporprod<domain>— your organisation's domain
For a tenant acme on a cluster prod under yourdomain.com, the base address is
acme.prod.yourdomain.com and the interfaces are:
| Interface | URL pattern | Example |
|---|---|---|
| Start page | https://<tenant>.<cluster>.<domain> | https://acme.prod.yourdomain.com |
| Connectivity editor | https://repo.<tenant>.<cluster>.<domain> | https://repo.acme.prod.yourdomain.com |
| Microfrontends and template-built applications | https://app.<tenant>.<cluster>.<domain>/?config=<id> | https://app.acme.prod.yourdomain.com/?config=olive-template-dashboard |
| Public service APIs | https://api.<tenant>.<cluster>.<domain> | https://api.acme.prod.yourdomain.com |
| Temporal Web UI, where enabled | https://workflow.<tenant>.<cluster>.<domain> | https://workflow.acme.prod.yourdomain.com |
Ask your Tenant Admin for the base address of your deployment; every interface follows from it.
Start Page
The Start Page is the initial entry point to the OLIVE Platform. It is accessible at the following URL:
https://<tenant>.<cluster>.<domain>
(for example: https://acme.prod.yourdomain.com)
When accessed, the Start Page checks whether the OLIVE core configuration has already been initialized.
If the configuration is not yet initialized, a dialog is displayed prompting you to initialize OLIVE using the core configuration.
For more information, refer to the Platform Setup & Deployment section in the OLIVE Administrator handbook.
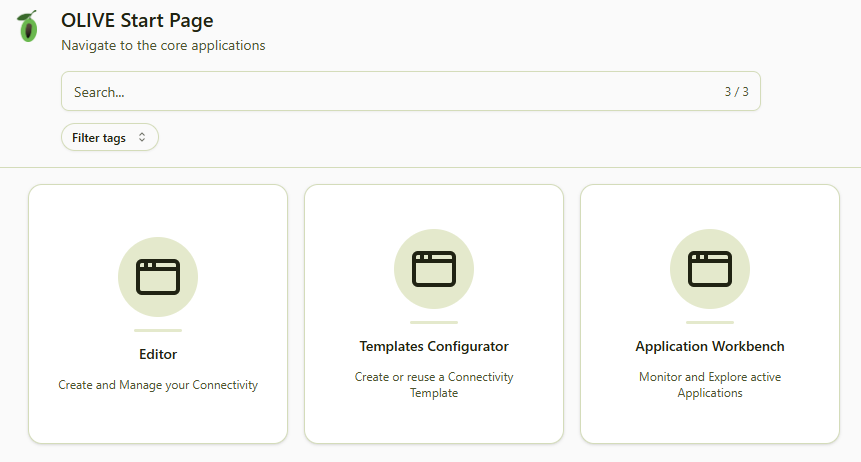
Once initialized, the Start Page displays three tiles that provide navigation to the main functional areas of the platform:
- Editor
Create and manage connectivity. - Templates Configurator
Create new connectivity templates or reuse existing ones. - Application Workbench
Monitor and explore active applications.
Editor
The Editor allows users to read, create, update, delete and export connectivity instances in raw JSON format. These actions require the Editor role.
Importing an OLIVE Connectivity Bundle (OCB) requires the Admin role; the Editor role is not sufficient. See How to Package a Use Case Solution.
Users without these roles have read-only access. They can view connectivity instances but are not permitted to see sensitive information contained within those instances.
core are hidden and admin-onlyThe connectivity entries delivered with the foundational package carry the tag core. They are hidden in the Editor unless you open it with the URL parameter debug=true, and from OLIVE 1.3 only a user with the Admin role may change them. See Content only an admin may change.
For detailed information on roles and permissions, see: Roles In OLIVE – Platform Permissions
Connectivity Instance Overview
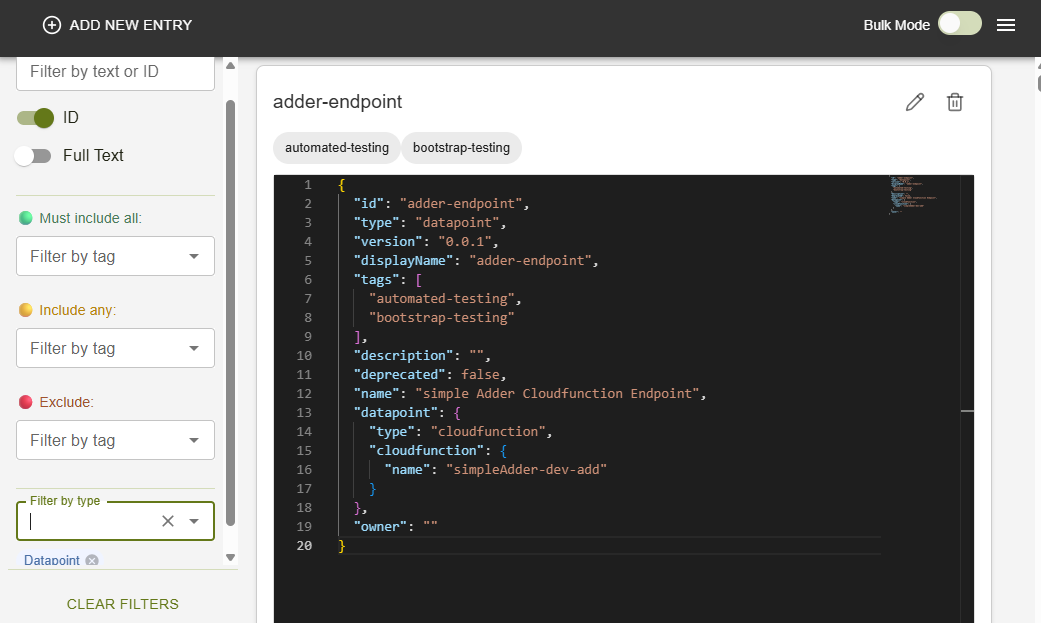
Upon opening the Editor, all available connectivity instances are displayed as tiles. Each tile presents the corresponding instance in JSON format.
A filter and search panel on the left-hand side allows you to quickly locate specific entries.
Creating a New Connectivity Instance
To create a new connectivity instance, click ADD NEW ENTRY in the top-left corner of the Editor. This opens a dialog where you can enter the new instance definition.
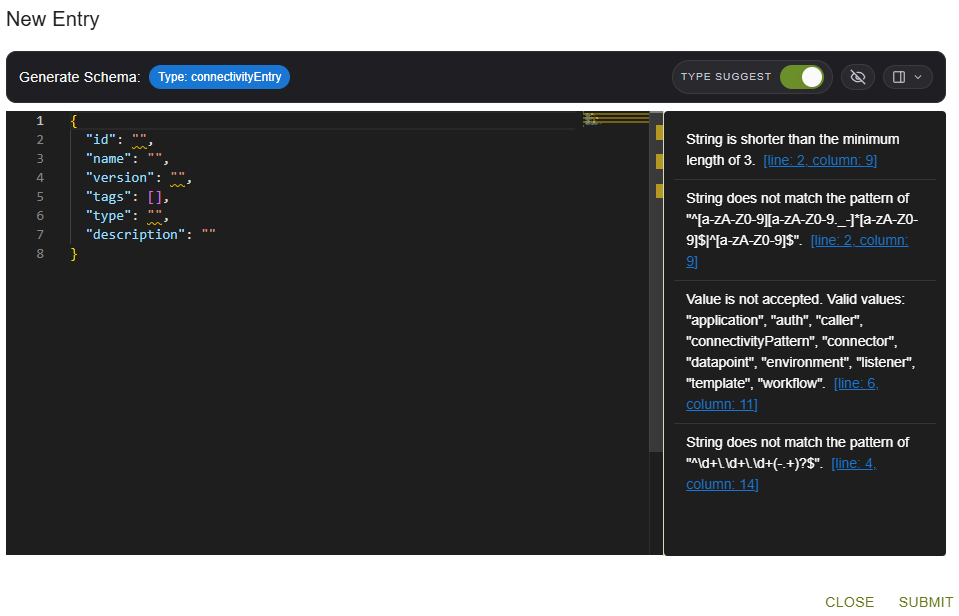
The input is validated against the selected schema. For more information about schema validation, see: Semantic Validation Rules.
If a connectivity instance contains sensitive information, you will be prompted to provide your OLIVE developer deployment credentials when viewing or editing those fields.
In production deployments, this prompt is not displayed. Users are already authenticated, and access to sensitive information is granted based on their assigned role.
More information regarding this you can find here: Authentication and Secrets Management for OLIVE environments
Import, Export, and Bulk Actions
In the top-right corner of the Editor, a menu provides options to import and export OLIVE Connectivity Bundles (OCB). When exporting, only the connectivity instances currently visible in the Editor are included.
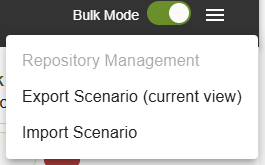
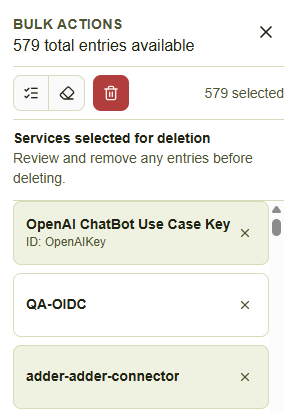
The top-right corner also includes a Bulk Mode option, which enables actions to be performed on multiple connectivity instances simultaneously.
In the current version, the only supported bulk action is Delete.
Templates Configurator
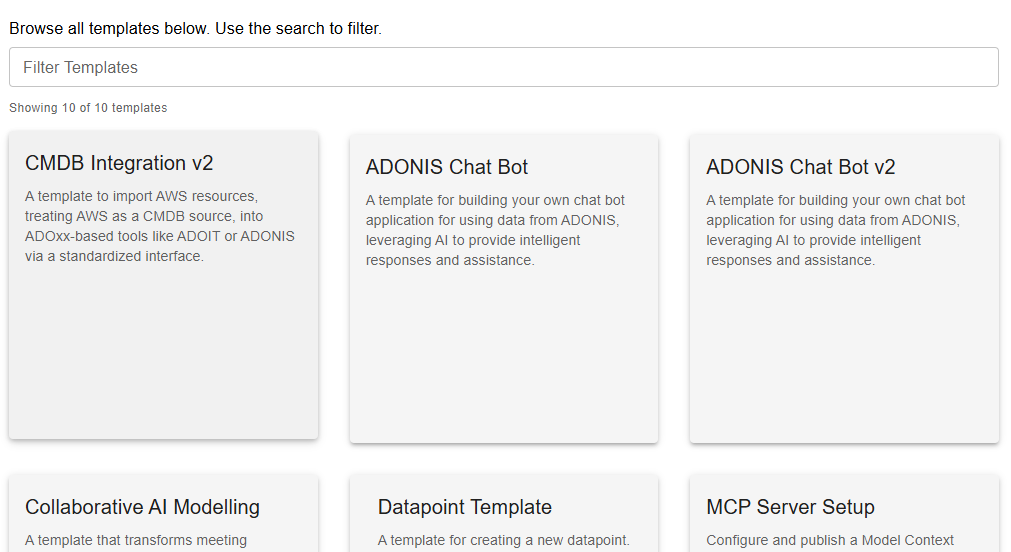
The Templates Configurator displays all available scenario templates that can be instantiated.
Selecting a specific template opens a dialog where you can provide the required parameters to create an instance of that scenario template.
A general explanation of how to create, customize, and instantiate templates can be found here:
How to Customize and Parametrize Connectivity
One of the templates delivered with the development package instantiates an MCP server from connectable elements you select, which makes them callable from an AI agent application: Using OLIVE from AI Agent Applications.
Application Workbench
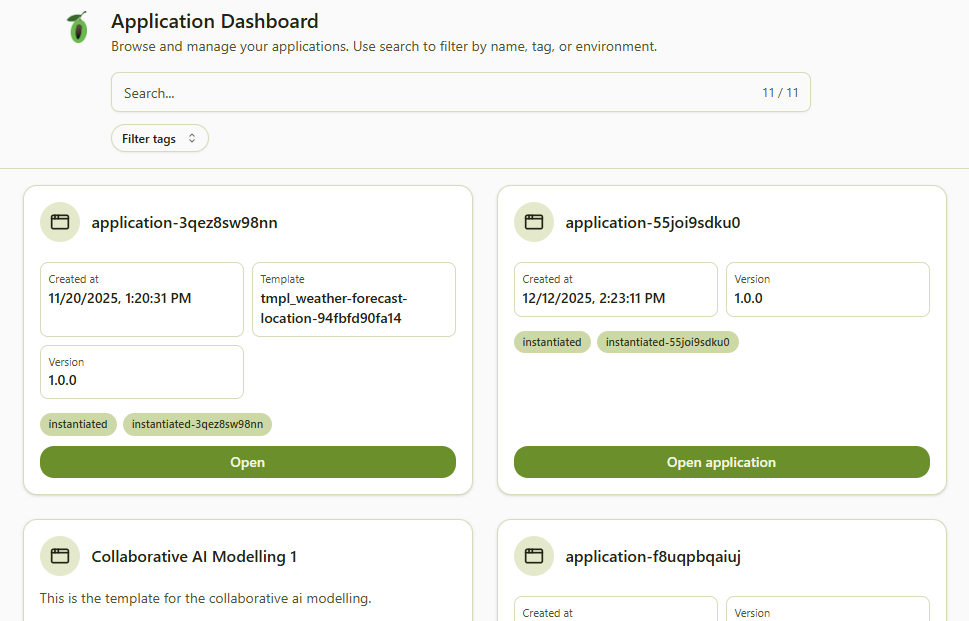
The Application Workbench lists all applications (see: Application) created from scenario templates.
It allows you to search for applications and, where supported by the underlying scenario, open the application’s microfrontend directly from the list.
From the Application Workbench, you can also open the Data MM instances referenced by an application in the editor.
At present, the monitoring capabilities are limited to listing available applications.
Technical Documentation
The technical documentation contains the public API documentation and the documentation of the OLIVE data types that can be created in the editor.
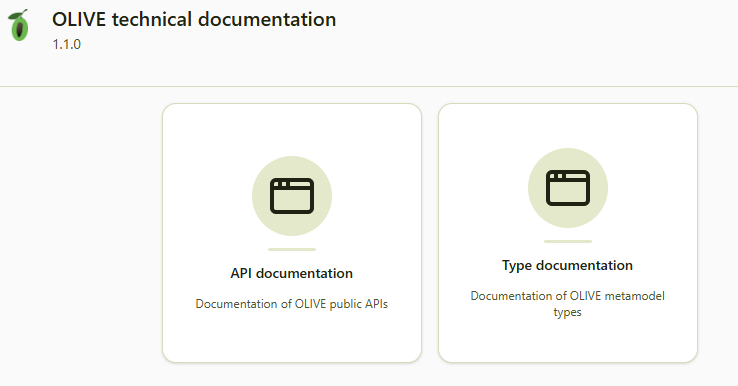
There is currently no direct link from the start page to the technical documentation.
How to open it and use it, please refer to: Technical Documentation.